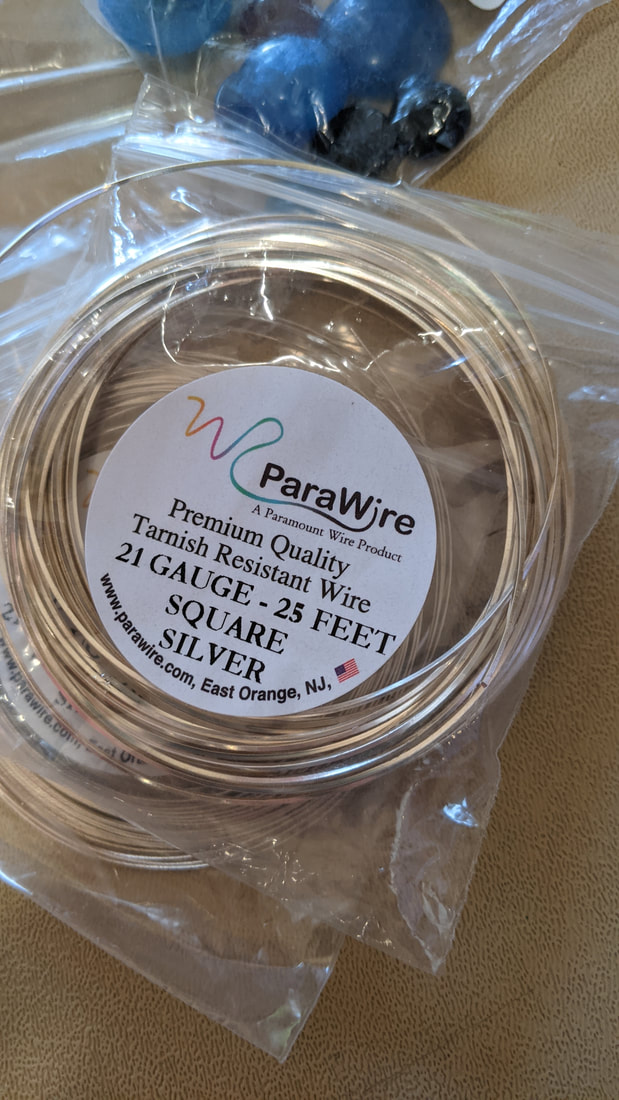
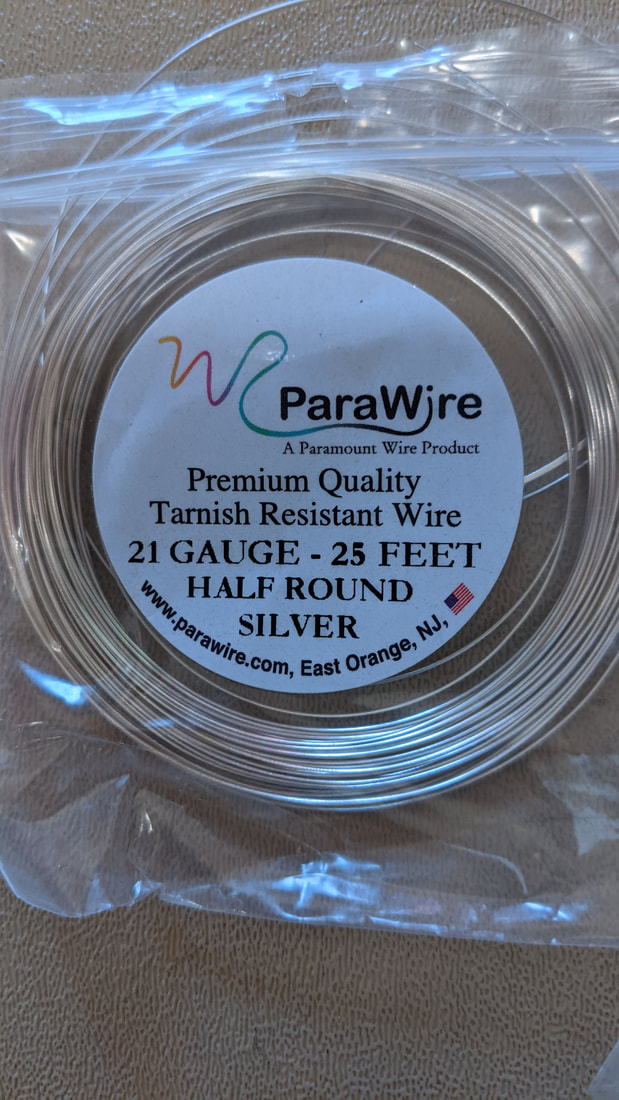
I went to a class to learn basic jewelry / wire wrapping. Below are pictures of the types of wire they used. It was Square and Half Round.
|
|
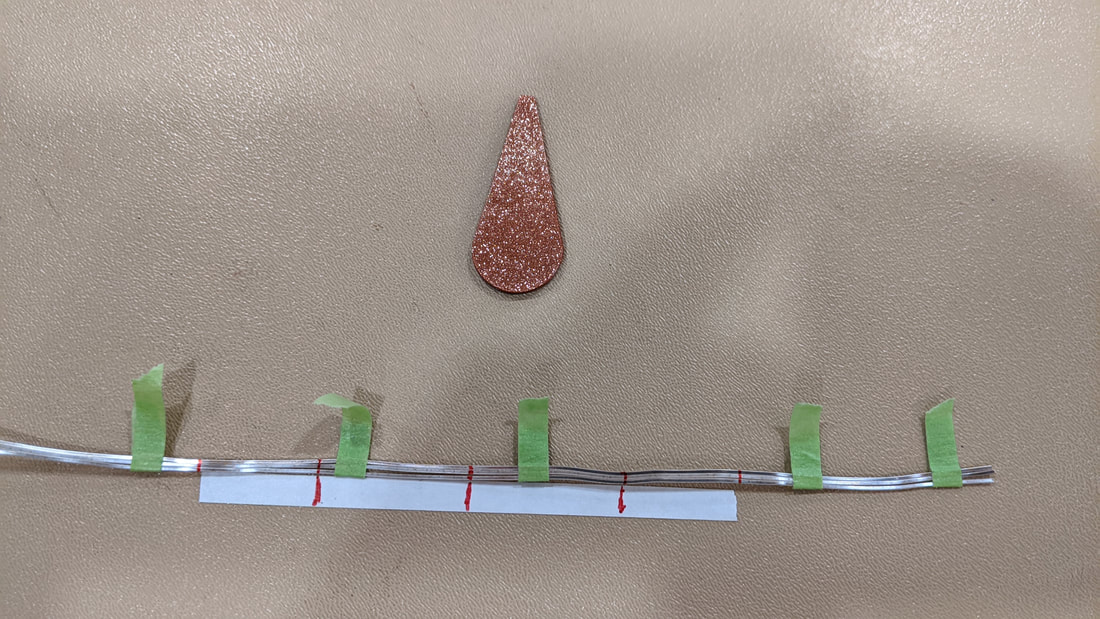
Then we picked a stone to wrap and measured with a piece of paper. I didn't get a picture of it but we took a strip of paper and wrapped it around the stone and cut the paper to fit the size of the stone. Then we cut 3 pieces of the SQUARE wire with plenty of extra length. The extra length will later become the part that holds the piece of stone onto a necklace. Then we marked with a marker where we wanted to weave the SQUARE wire to held it all together and also the total length. See 5 red lines below.
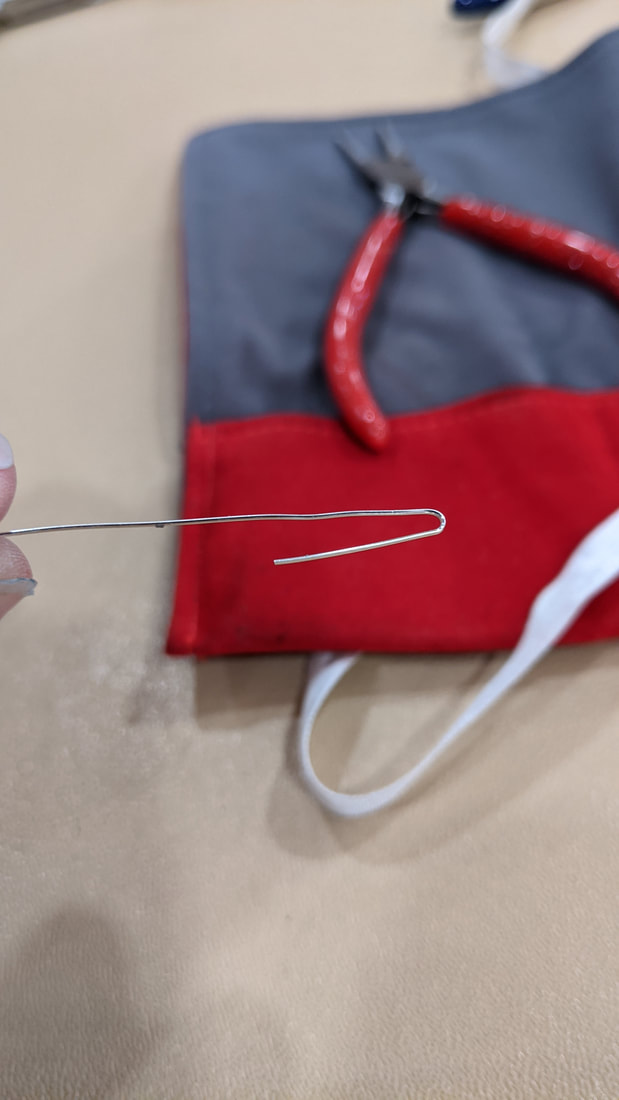
Below shows how we started by bending the HALF ROUND wire to have a starting point for wrapping. It doesn't actually need this much bent over, just enough to create a hook to start the wrap and have it stay on.
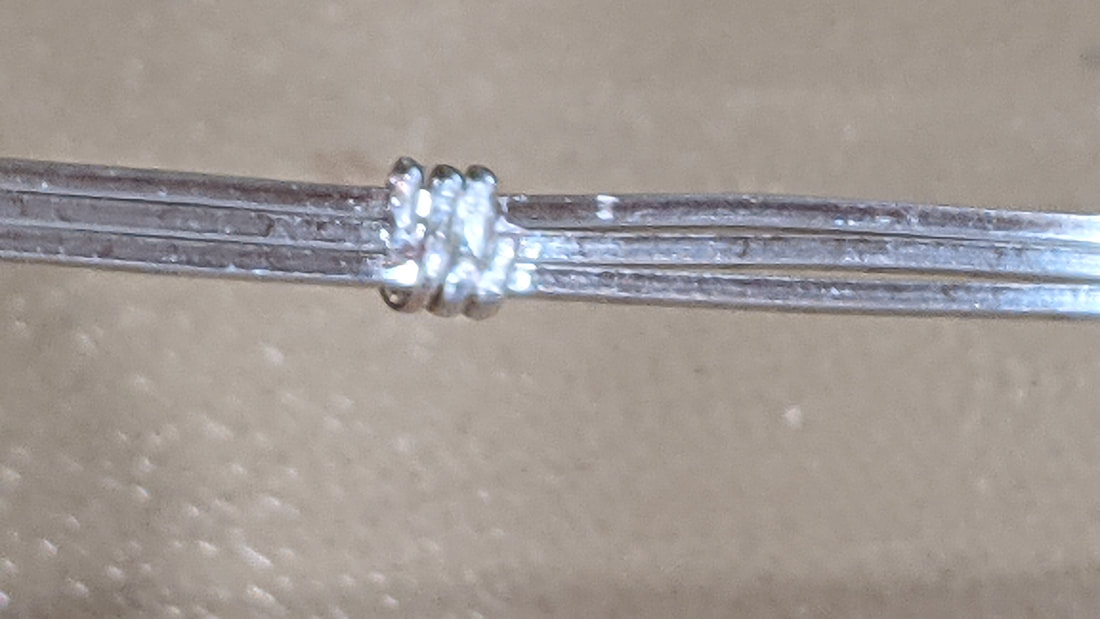
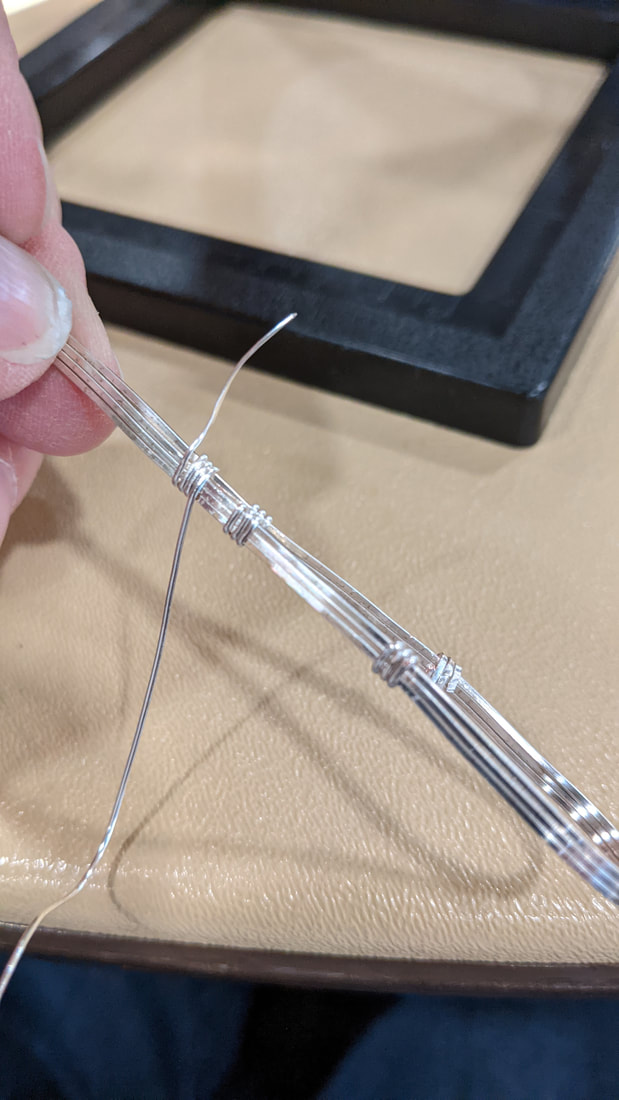
Next we place the half round wire with the flat size next to the square wires. We wrap the wire around 3 or 4 times to secure the square wires together. Note that we keep the square wires straight and flat against each other.
Note that we make sure that the starting end and final end both end mid away across the square wire and on the same side which will end up being the side against the stone. That way you will not see the ends.
Note that we make sure that the half round is close, and tight around the square wires, and tight against itself.
- Use pliers to make everything tight and straight. Using nylon tipped pliers helps to prevent scratches.
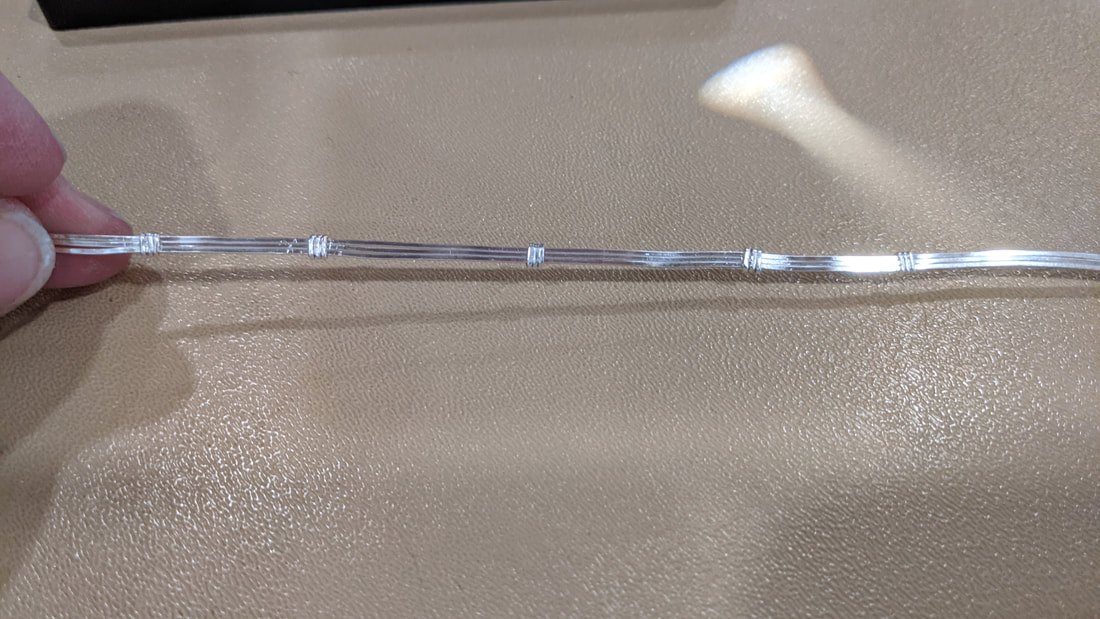
Do the above wrapping at each marked point. See below.
Gently bend the wires around the shape of the rock
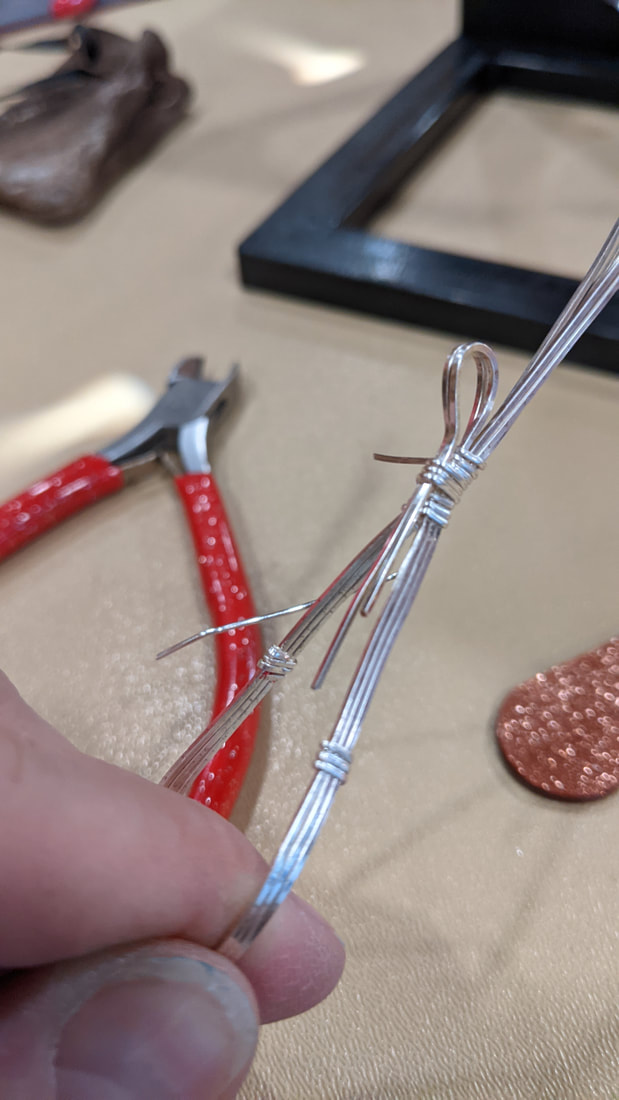
Wrap the left and right sides together in the same way you did the other wraps but don't cut off and end the wrap. More to come.
Bend the two closest wires, one from each side, down and add to the wrap. This will be the part when you add the necklace to. It is called the Bail (but not sure of correct spelling)
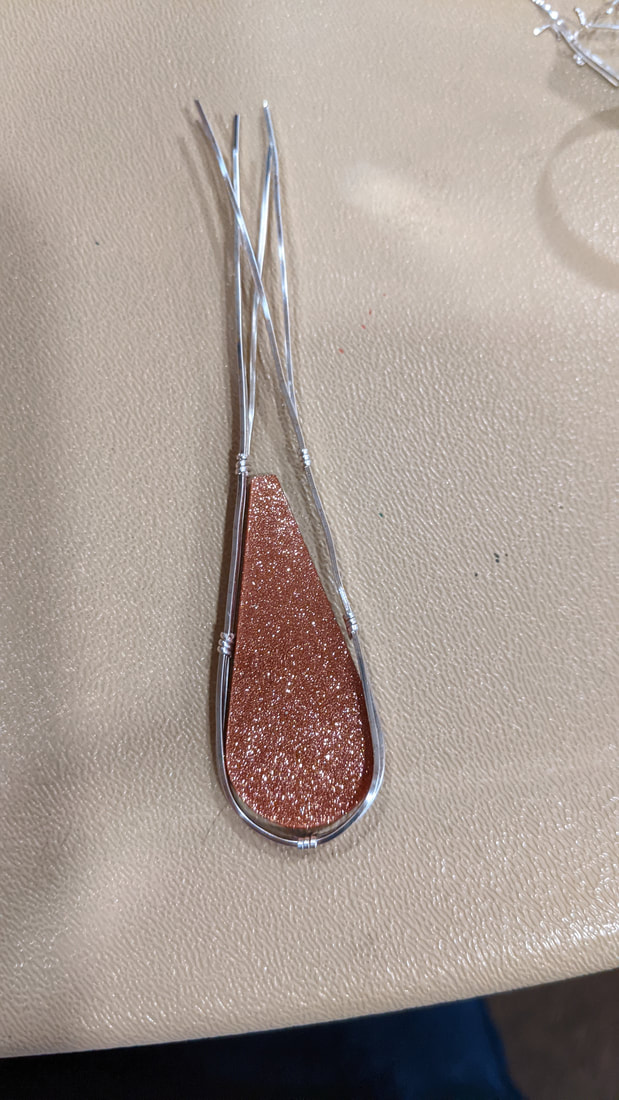
Next, add the stone. Secure the stone by bending each section of the top SQUARE wire in above the stone, and also bending the bottom square wire into behind the stone. Below is a picture of the first two stones that I wrapped. Note how the wires are gently bent in over the stones.
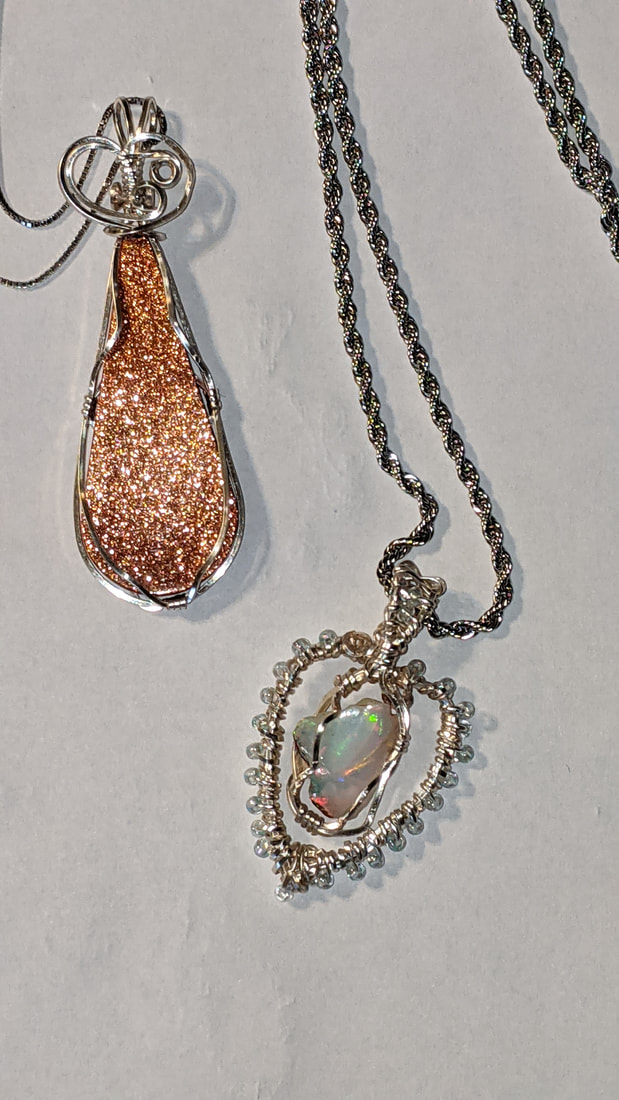
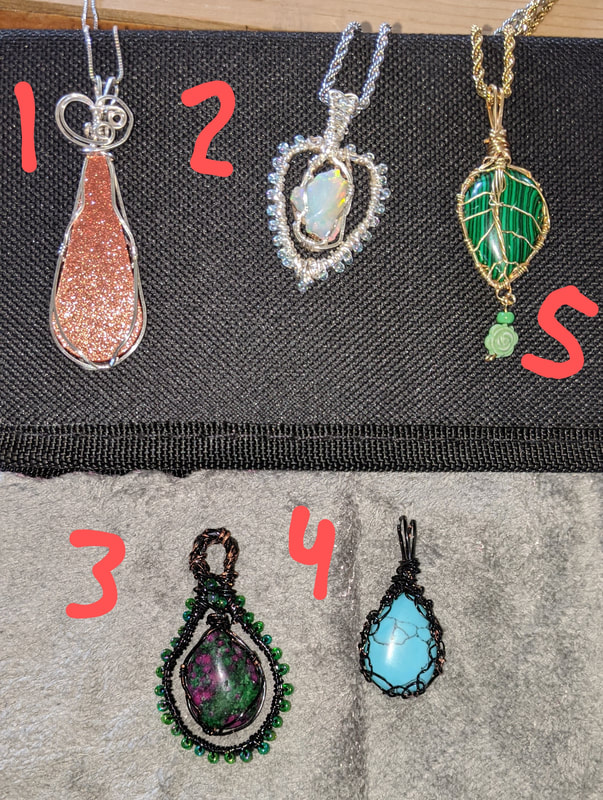
The rest of the wires sticking up at the top are then shaped and "curled" down to add texture and layers to the finished project. You can shape these however you want. Below is a picture of the first 5 pieces that I made myself. Each has a slightly different technique and top "bail". Note that there are many other ways to do this. I am just sharing how I learnt the very basics. Good luck!